# Building a Currency Converter in Vue.js
# Introduction
In this article, we build a currency converter in Vue.js (opens new window), with the help of our JavaScript package (opens new window) which handles the requests to the API itself.
Furthermore, we will use vite (opens new window) as build tool and tailwind (opens new window) for easy styling.
# Prerequisites
- An API Key for fxapi.com (opens new window)
# Scaffold your vite project
Navigate to your workspace on your machine where you want to create your currency converter project and initialize a new vite project:
Then follow the prompts in your console. Make sure to select vue for your project setup!
Afterward, switch to the newly created project folder.
# Install the fxapi package
As mentioned above, we will use our JavaScript package (opens new window):
# Install & configure tailwind.css (optional)
We want to use Tailwind CSS v3, so add it to your project together with postcss and autoprefixer for a clean and stable build process:
Afterward, initialize tailwind, which will create a tailwind.config.js in your project's root directory:
npx tailwindcss init
Open the newly created tailwind.config.js and modify the content attribute to match the vite setup:
module.exports = {
  content: ["src/**/*.{html,js,vue}"],
  theme: {
    extend: {},
  },
  plugins: [],
}
For loading the tailwind styles, create a css folder in your src directory. In this css folder, create a style.css file with the following lines:
@tailwind base;
@tailwind components;
@tailwind utilities;
Now you can include your styles in your main.js (ideally under the existing imports):
import './css/style.css'
As a last step, we need to tell postcss to include both tailwind and autoprefixer. Otherwise, the tailwind classes won't end up in our final css.
To do so, create a file named postcss.config.js in your project root directory next to your tailwind config and add the following lines:
module.exports = {
    plugins: [
        require('tailwindcss'),
        require('autoprefixer')
    ]
}
# Start vite in dev mode
Now that our preparations are done, we can start up vite:
This should open up a new tab in your browser automatically. If not, open http://localhost:3000/.
You should now see the default Vite index page reading Hello Vite!.
# Create a CurrencyConverter Single-File-Component (SFC)
Go to src/components and create a Vue file named CurrencyConverter.vue. We will use the Options API of Vue.js.
# Script
This component will hold the parameters which will be sent to the API in params, the results we get back in results and of course an instance of our JavaScript helper class fxapi which needs to be initialized with your API Key (replace YOUR-API-KEY).
The only method we will need for this basic example is a submit function, which will handle the API call to the latest endpoint via our JavaScript package (opens new window).
<script>
import fxapi from '@everapi/fxapi-js';

export default {
    name: 'CurrencyConverter',
    data () {
        return {
            params: {
                base_currency: 'USD',
                currencies: 'EUR,CAD'
            },
            results: null,
            fxapi: new fxapi('YOUR-API-KEY')
        }
    },
    methods: {
        submit () {
            this.results = null;
            this.fxapi.latest(this.params).then(response => {
                if (response.data) {
                    this.results = response.data;
                }
            });
        }
    }
}
</script>
# Template
The <template> consists of two main parts:
- A
<form>that wraps the inputs and triggers thesubmit - A container where we loop over the received currencies stored in
results
<template>
    <div>
        <form
            class="mx-auto w-full max-w-sm bg-white shadow rounded-md p-5 space-y-3 text-sm"
            @submit.prevent="submit"
        >
            <div class="flex items-center justify-between space-x-5">
                <label for="base_currency_input">Base currency:</label>
                <input
                    v-model="params.base_currency"
                    type="text"
                    class="border-slate-300 border rounded-md py-2 px-4 text-sm"
                />
            </div>
            <div class="flex items-center justify-between space-x-5">
                <label for="currencies">Target currencies:</label>
                <input
                    v-model="params.currencies"
                    type="text"
                    class="border-slate-300 border rounded-md py-2 px-4 text-sm"
                />
            </div>
            <button
                type="submit"
                class="bg-slate-800 text-white rounded-md py-2 px-4 mx-auto relative block"
            >Get Latest Rates</button>
        </form>
        <div
            v-if="results"
            class="mx-auto my-5 w-full max-w-sm bg-white shadow rounded-md px-5 py-3 text-sm divide-y divide-dotted divide-slate-300"
        >
            <div
                v-for="result of results"
                :key="result.code"
                class="flex items-center justify-between py-2"
            >
                <strong>{{ result.code }}</strong>
                <span>{{ result.value }}</span>
            </div>
        </div>
    </div>
</template>
All CSS classes used here are Tailwind specific and can be freely adapted or removed.
# Using the CurrencyConverter Component
To use our freshly created component, go to the App.vue and replace the HelloWorld.vue import with our CurrencyConverter.vue file:
import CurrencyConverter from './components/CurrencyConverter.vue';
in the <template> block, put our component to good use:
<template>
    <div class="bg-gradient-to-b from-emerald-500 to-cyan-900 min-h-screen py-5">
        <currency-converter/>
    </div>
</template>
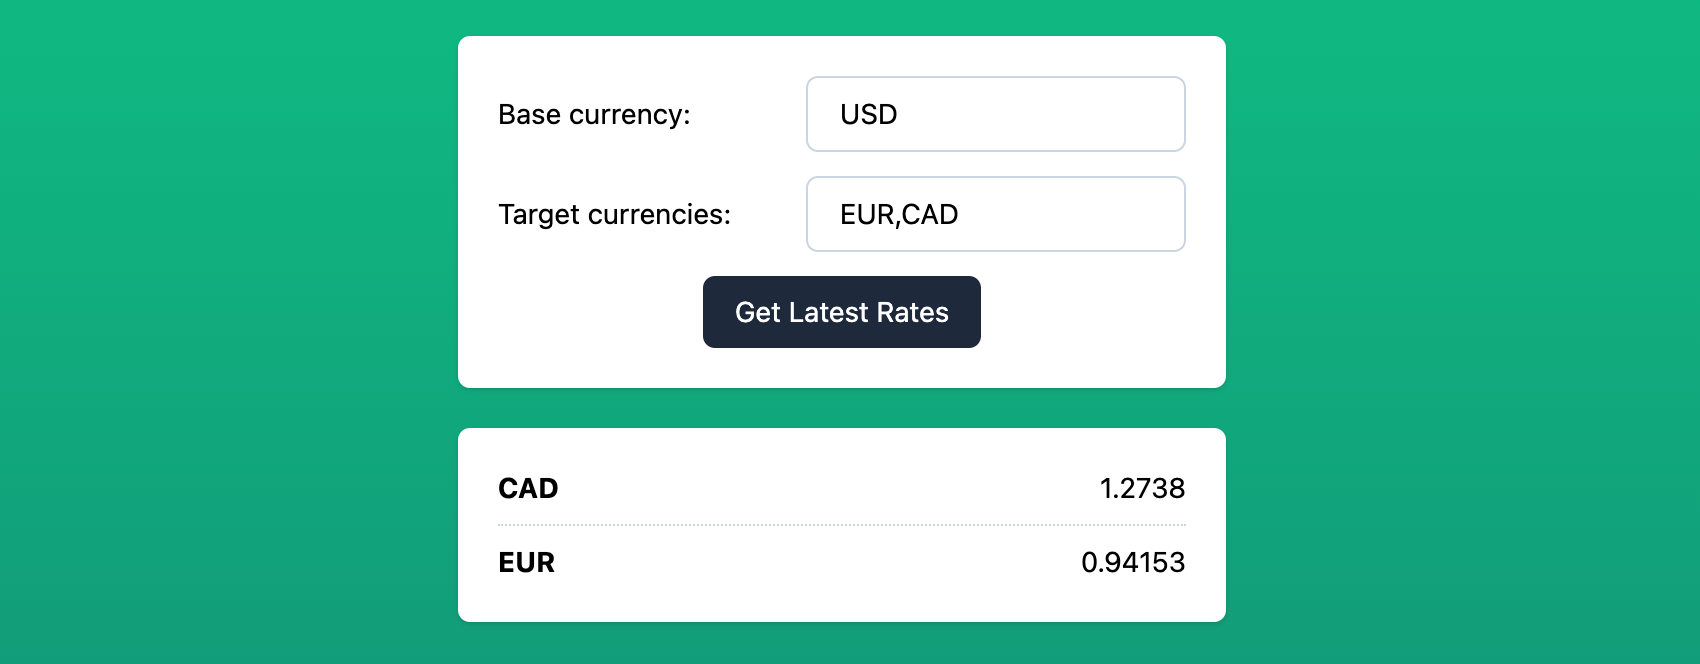
And that's it! You have successfully built a currency converter in Vue.js.